Today, we’re thrilled to welcome Camelia to our community from the Advisors Circle. She has previously shared some fantastic designs with us, such as her elegant Terrace Dresses, cozy Neighborhood Sweatshirts, and charming Afternoon Tea Blouses.
If you’ve been following our recent Hollywood Trousers Sew-Along, you know how versatile and stylish they can be. And guess what? Camelia is here today with a tutorial on how to add slanted pockets to your trousers, perfect for giving them that extra touch of functionality and flair.
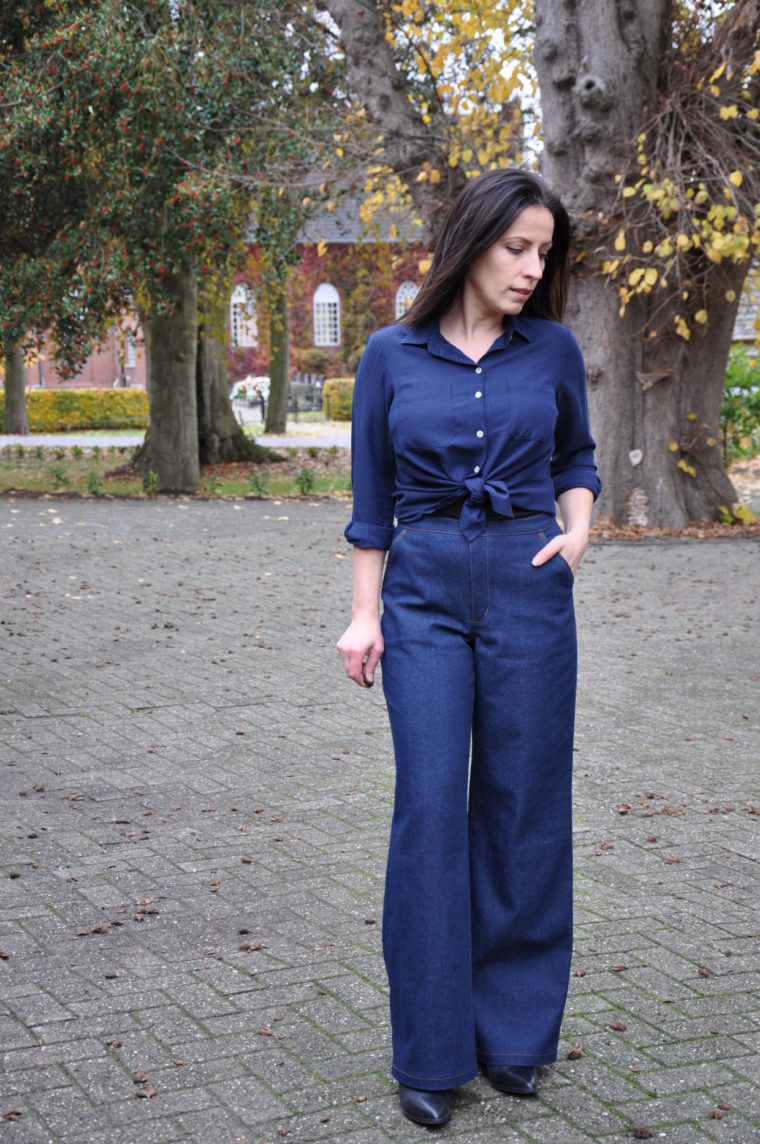
As soon as I laid eyes on the Hollywood Trousers pattern, I fell in love with its sleek design. However, since my daily wardrobe leans more casual, I decided to make a denim version instead. Adding slanted pockets seemed like the natural choice for this more rugged look. Let me walk you through the process I used to modify the pattern and sew these functional yet stylish pockets.
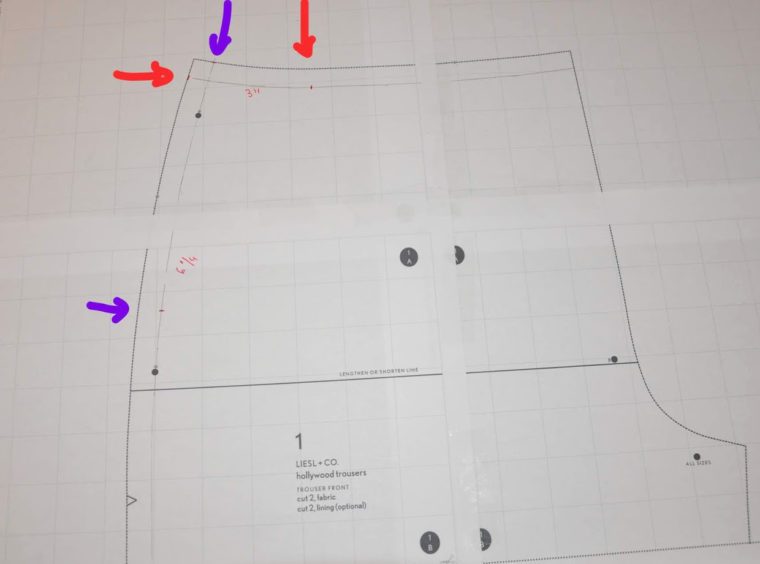
All the modifications are made on the front leg piece of the pattern. Start by making all necessary fit adjustments before drafting your pockets. Remember, these measurements work well for me, but feel free to tweak the size of your pockets according to your personal preferences or hand size.
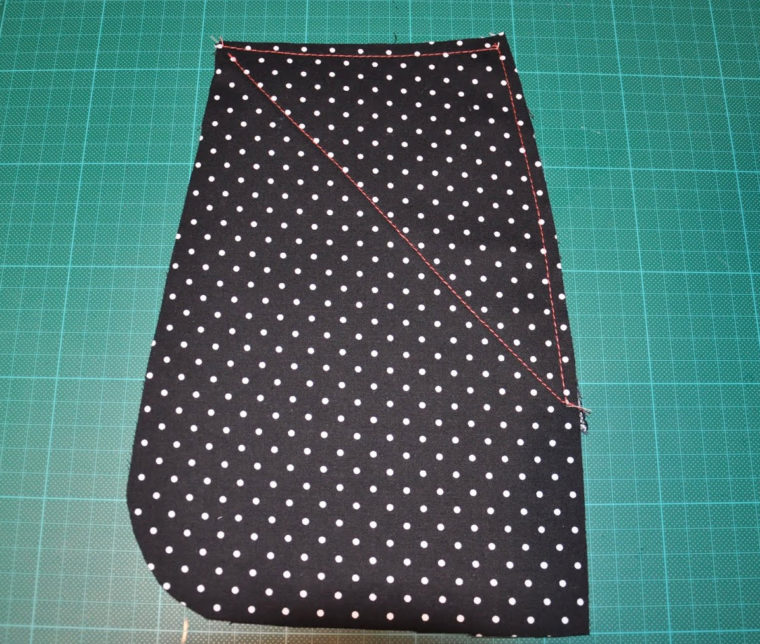
To get started, mark the seam allowance to get a clearer idea of the pocket's dimensions. First, measure 3 inches inward from the side (marked with red arrows) and 6¼ inches down from the waist edge along the side seam (marked with purple arrows). These points define the pocket opening.
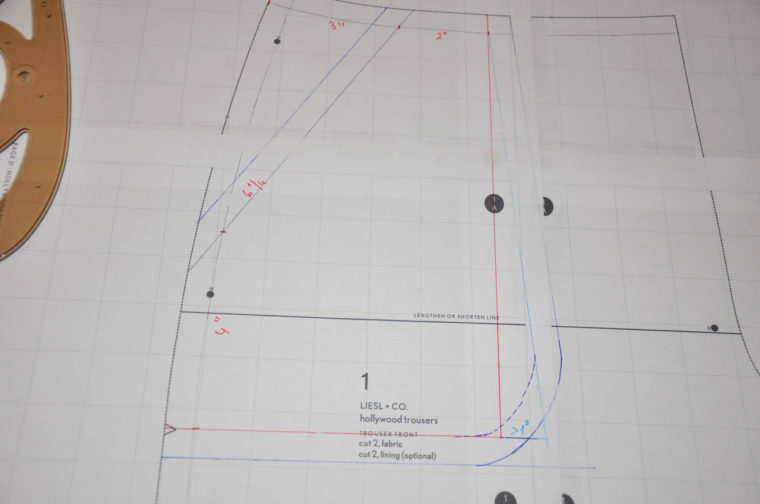
Next, connect the two points you just measured to create the pocket opening. Then, measure 4 inches down from the side seam (marked with purple arrows) to determine the depth of the pocket. Additionally, measure 2 inches up from the bottom of the waist edge (marked with red arrows) to establish an anchor point for the pocket, ensuring it stays securely attached when worn.
To shape the pocket bag, draw a straight line from the 4-inch point on the side seam and another from the 2-inch point on the waist. For a more spacious pocket, I extended the side line about an inch further and blended it back toward the waist (shown in blue).
I prefer rounding the corners of the pocket bag slightly, as shown below. At this stage, you can also add seam allowances—keeping the standard ½ inch, as used elsewhere in the pattern.
The next step is to trace the new pocket pieces. The pocket facing (pink paper) can be cut from lining material, while the pocket bag (yellow paper) can be made entirely from the main fabric. For my denim trousers, I opted to use a small facing for the pocket bag from the main fabric and lined the rest with fabric scraps.
Once the new pocket pieces are traced, trim the pocket opening on the front leg pattern piece while retaining the seam allowance.
If you're working with thicker fabrics, consider creating a small facing for the pocket bag to cover only the pocket opening. Make sure it’s large enough to prevent the lining from peeking out.
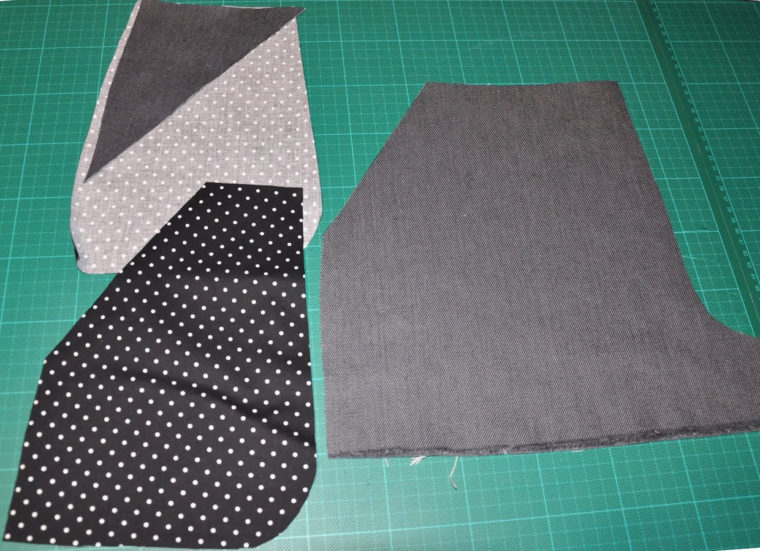
With everything prepared, let’s move on to sewing the pockets. Below are the pieces I cut out, including a small section of the front leg for demonstration purposes and contrasting thread for visibility. Note that I chose to have the right side of the lining fabric visible so that the wrong side would be the inside of the pocket. Keep this in mind if you prefer the opposite.
Begin by finishing the long edge of the pocket bag facing (I used a serger) and attach it to the top of the pocket bag.
From the other side, it looks like this:
Next, sew the pocket facing to the front leg piece with a ½ inch seam allowance and trim the seam allowance down to ⅛ inch. In my case, I stitched the wrong side of the pocket to the right side of the pants, so the polka dot side would be visible inside the pocket once completed.
Press the pocket facing to the back, ensuring the seam is tucked neatly inside to avoid any lining showing from the outside. Topstitching can enhance the appearance if desired.
For a quick finish, place the pocket bag over the previously sewn piece and stitch along the pocket edge, trimming and finishing the edge as preferred (serger, zigzag, or bias binding).
However, for a more polished finish, consider doing a French seam on the pocket edge. After topstitching, open the pocket facing again to one side.
Place the pocket bag on top of the pocket facing and stitch with a ¼ inch seam allowance. Trim the seam allowance to ⅛ inch.
Turn the pocket bag right side out and press it nicely. Since the seam was already trimmed, there’s no need to clip the curved parts of the pocket. Stitch around again, ⅜ inch from the edge. To keep the pocket in place during construction, baste it at the waist and side seams.
Your slanted pockets are now complete!
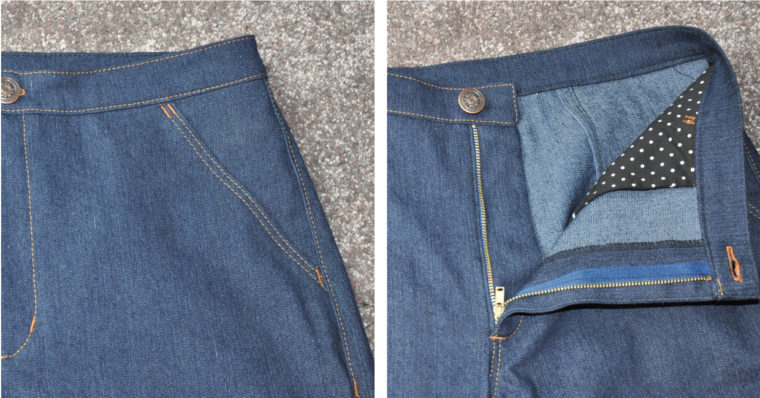
I hope you’ll give this method a try—it’s a simple way to transform your Hollywood Trousers into something truly unique.
If you enjoyed this tutorial, you might also like checking out our collection of Eleven Tutorials for Pockets.
---
Happy sewing, and may your projects be both fun and functional!
Cotton Yarn,Cotton Yarn For Crochet,100% Cotton Yarn,Dk Cotton Yarn
Jiangsu Boyue Chemical Fiber Co., LTD , https://www.jsbyhx.com